
Hello in a new year! I hope that 2023 is going to be a great year for you. Today I would like to share my first project of 2022 – EveryDay Purse from Hobbii’s free pattern library. This pattern was designed by Tine Sommer Hansen.
If you would like to follow it, it’s available here.

I was looking for something new and fresh to start the new year. I have never crocheted a purse, so I decided to try it out. EveryDay Purse is very simple and requires beginner crochet skills, such as single crochet and single crochet in a back loop.
To make this purse I needed to get a handbag base, handles and magnetic buttons for closing.
One thing that I wish this pattern included was a pocket for on the inside of the bag. It is handy to have one to keep keys/wallet/phone. That’s why I made my own and I’m going to share how I did it in this post.
EveryDay Purse – The Making
Supplies Needed

To make the EveryDay Purse I needed to do some shopping at Hobbii. I needed to get a handbag base, handles, magnetic buttons and enough yarn – pattern calls for 6 skeins of cotton yarn from Hobbii’s Rainbow 8/4 line. Original color was sold out and to be honest, pink is not my color.
I chose Greyish Purple (#13) instead. I find it hard to photograph this yarn true to color.
Making of EveryDay Purse
This purse pattern is very beginner friendly. You really need to know only how to do single crochet and how to join your yarn. I used all of 6 skeins of Hobbii Rainbow 100% Cotton yarn, because I made a pocket.
It took me a week to finish this bag, because I found it very monotonous. I’m glad it’s finished. Would I make another one, knowing how I felt while making this one? Yes!
Pocket – Easy Crochet Pattern
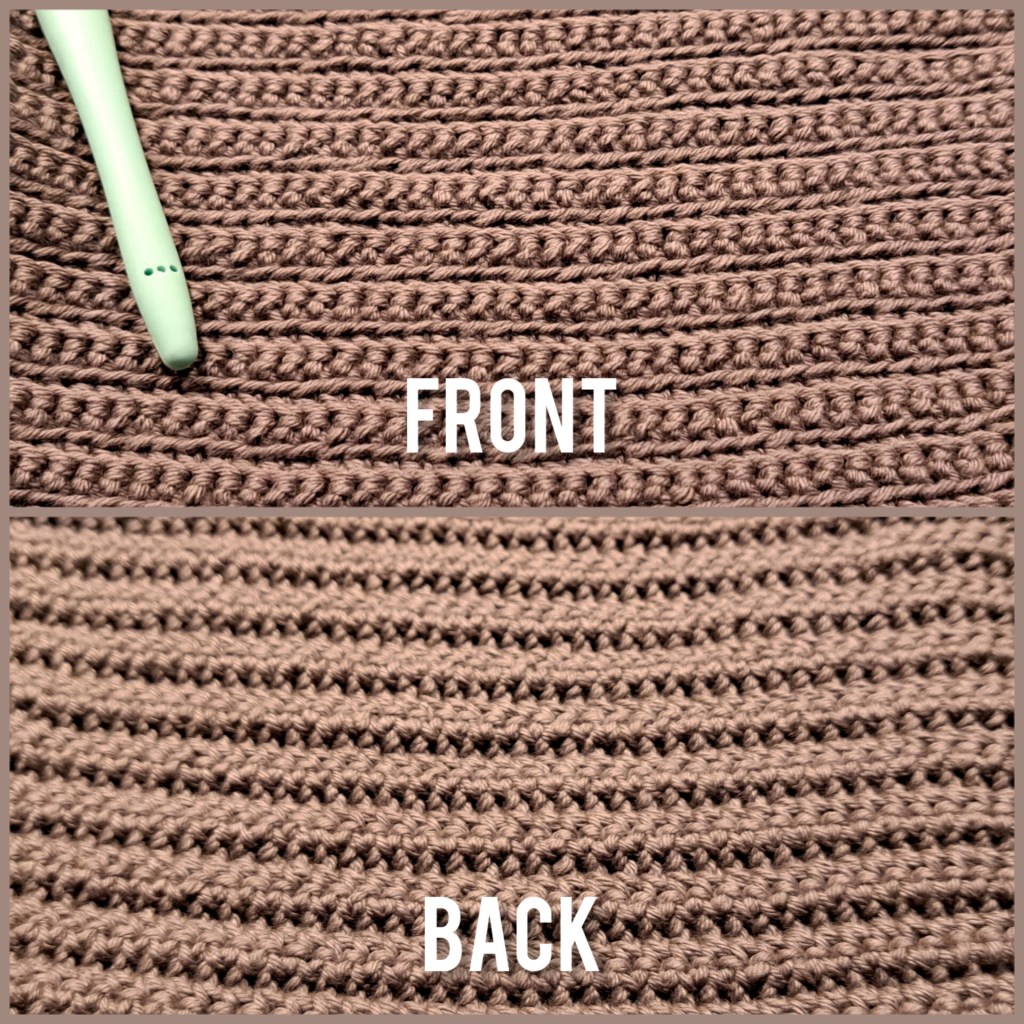
When I picked EveryDay Purse, I missed one thing – a pocket where I can store the most important belongings. I decided to make one myself and kind of stick to outside look of the purse – that’s why I used a lot of crocheting in front and back loop.
I used the same yarn as the body of the bag. I also installed another magnetic button on it.
Make a Pocket
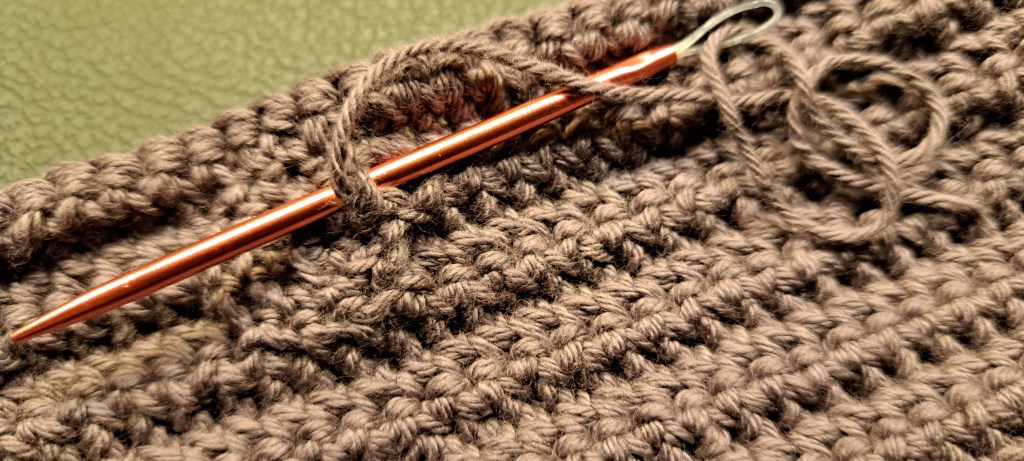
Chain 31, using double strand of chosen yarn. We start from making the bottom of the pocket.
Row 1: start from 2nd loop from your crochet hook, SC in each (29);
Row 2-7: Turn your work, Ch 1, SC in each stitch (29);
Row 8: Turn your work, Ch 11, 38 SC, Ch 11 (47);
Row 9: Turn your work, Ch 1, 38 SC, 11 SL ST (47);
Row 10: Turn your work, Ch 1, 47 SC FLO (47);
Row 11: Turn your work, Ch 1, 47 SC BLO (47);
Row 12: Turn your work, Ch 1, 47 SC FLO (47);
Row 13: Turn your work, Ch 1, 47 SC BLO (47);
Row 14: Turn your work, Ch 1, 47 SC FLO (47);
Row 15: Turn your work, Ch 1, 47 SC BLO (47);
Row 16: Turn your work, Ch 1, 47 SC FLO (47);
Row 17: Turn your work, Ch 1, 47 SC BLO (47);
Row 18: Turn your work, Ch 1, 47 SC FLO (47);
Row 19: Turn your work, Ch 1, 47 SC BLO (47);
Row 20: Turn your work, Ch 1, 47 SC FLO (47);
Row 21: Turn your work, Ch 1, 47 SC BLO (47);
Row 22: Turn your work, Ch 1, 47 SC FLO (47);
Row 23: Turn your work, Ch 1, 47 SC BLO (47);
Row 24: Turn your work, Ch 1, 47 SC FLO (47);
Row 25: Turn your work, Ch 1, 47 SC BLO (47);
Row 26: Turn your work, Ch 1, 47 SC FLO (47);
Row 27:bTurn your work, Ch 1, 47 SC BLO (47);
Row 28: Turn your work, Ch 1, 47 SC FLO (47);
Row 29: Turn your work, Ch 1, 47 SC BLO (47);
Row 30: Turn your work, Ch 1, 47 SC FLO (47);
Row 31: Turn your work, Ch 1, 47 SC BLO (47);
Row 32: Turn your work, Ch 1, 47 SC FLO (47);
Row 33: Turn your work, Ch 1, 47 SC BLO (47);
Row 34: Turn your work, Ch 1, 47 SC FLO (47);
Row 35: Turn your work, Ch 1, 47 SC BLO (47);
Row 36: Turn your work, Ch 1, 47 SC FLO (47);
Row 37: Turn your work, Ch 1, 47 SC BLO (47);
Row 38: Turn your work, Ch 1, 47 SC FLO (47);
Row 39: Turn your work, Ch 1, 47 SC BLO (47);
Row 40: Turn your work, Ch 1, 47 SC FLO (47);
Row 41: Turn your work, Ch 1, 47 SC BLO (47);
Row 42: Turn your work, Ch 1, 47 SC FLO (47);
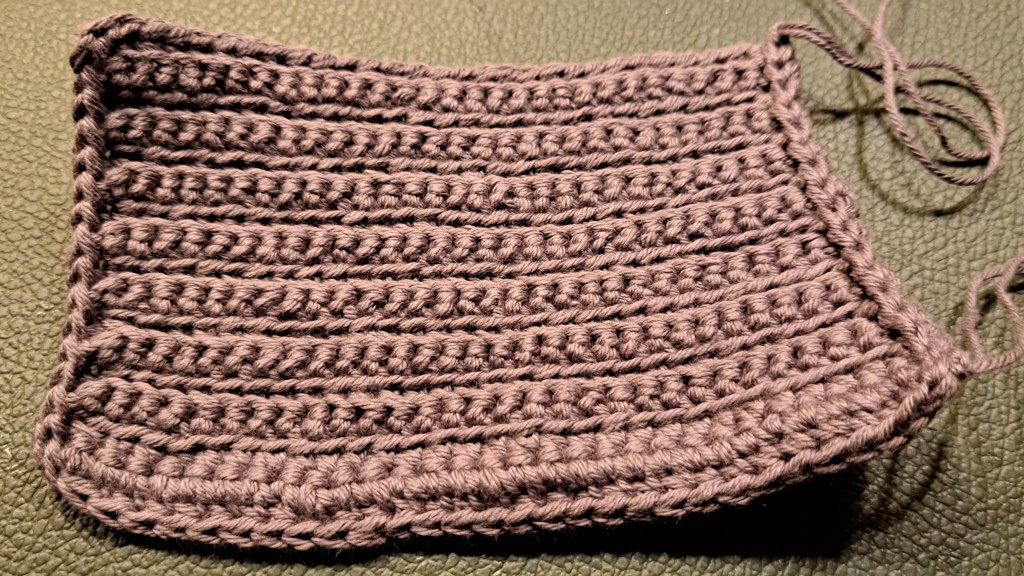
Row 43: Turn your work, Ch 1, 47 SC BLO (47), fasten off and weave in the ends.

Sew the bottom to the sides of the pocket. After that, place your magnetic button in the middle of the outside of the pocket. I used a button that has metal flaps on the back for my pocket:

Then I made a patch to hide the metal flaps. If you use magnetic buttons with metal flaps, you will need to make two of these patches:
Using single strand of chosen yarn make a Magic Circle and crochet 6 SC in Magic Circle.
Row 1: 2 SC in each stitch (12);
Row 2: SL ST, fasten off and leave a long tail for sewing
Sew it on to cover metal flaps, as shown below:
Make a Pocket Flap
Using double strand of chosen yarn chain 31
Row 1-2: 29 SC, turn your work and Ch 1;
Row 3: 29 SC FLO, turn your work and Ch 1;
Row 4: 29 SC BLO, turn your work and Ch 1;
Row 5: 29 SC FLO, turn your work and Ch 1;
Row 6: 29 SC BLO, turn your work and Ch 1;
Row 7: 29 SC FLO, turn your work and Ch 1;
Row 8: 29 SC BLO, turn your work and Ch 1;
Row 9: 29 SC FLO, turn your work and Ch 1;
Row 10: 29 SC BLO, turn your work and Ch 1;
Row 11: 29 SC FLO, turn your work and Ch 1;
Row 12: 29 SC BLO, turn your work and Ch 1;
Row 13: 29 SC FLO, turn your work and Ch 1;
Row 14: 29 SC BLO, turn your work and Ch 1;
Row 15: 29 SC FLO, turn your work and Ch 1;
Row 16: 29 SC BLO;
Row 17: SL ST on the side of the pocket, do 29 SC on the bottom and SL ST the other side of the pocket, fasten off and weave in the ends.
I found it easier to flip the purse inside out and sew it after I was done with the body.

I’m happy with how this purse came out and that I managed to stay focused on it. It is officially my first make of the year 2023.
What is your first finished item in 2023? What projects are you working on right now? Let me know!


Leave a comment